tel: +1 (800) 996-8617
  • Heavy Duty 360 Product Photography Setup and Workflow by Utah Trikes

    Utah Trikes (www.UtahTrikes.com) is the nation's leading retailer of recumbent trikes, and it's no wonder. With the ability to offer unparalleled customization, people from all over the USA get their trikes built and shipped from this shop in Payson, Utah to their homes.

    "Because we ship so many customized trikes out to our customers it is important that they are setup exactly how they want prior to shipping," - says Ashley Guy, president of Utah Trikes.

    "Years ago, we implemented the procedure of taking a photo shoot of each trike once completed to send to our customers. This allows them to see and approve exactly the trike they're getting before shipping. We also put the gallery of the more customized trikes on our website which doubles as marketing and helps others see what options are available."

    As the list of customization options has grown it has become important to send more and more pictures showing all the details. The folks at Utah Trikes decided that sending their customers a 360 product view of their trikes was the way to go. The easy part was choosing WebRotate 360, but they knew it was going to to take a pretty big commitment if they were going to do this for every trike they build.

    "Automation is key here," - said Guy, "in order to make this viable we need to get the process down to about 30 minutes from beginning the photo shoot to being live on the web."

    Utah Trikes couldn't find a ready made solution that worked for them so they decided to build their own. Of course, it helps when you have your own fabrication facility. The UTCustom Skunkworks built a platform stage from aluminum tubing, with a turntable measuring 8ft in diameter.

    The turntable is supported by 32 4 inch caster wheels and driven by a crazy combination of sprockets that could only come from a bike shop. The final gear reduction is 360:1 and powered by a motor. Flip the switch and the turntable revolves at a consistent 1 revolution per 195 seconds.

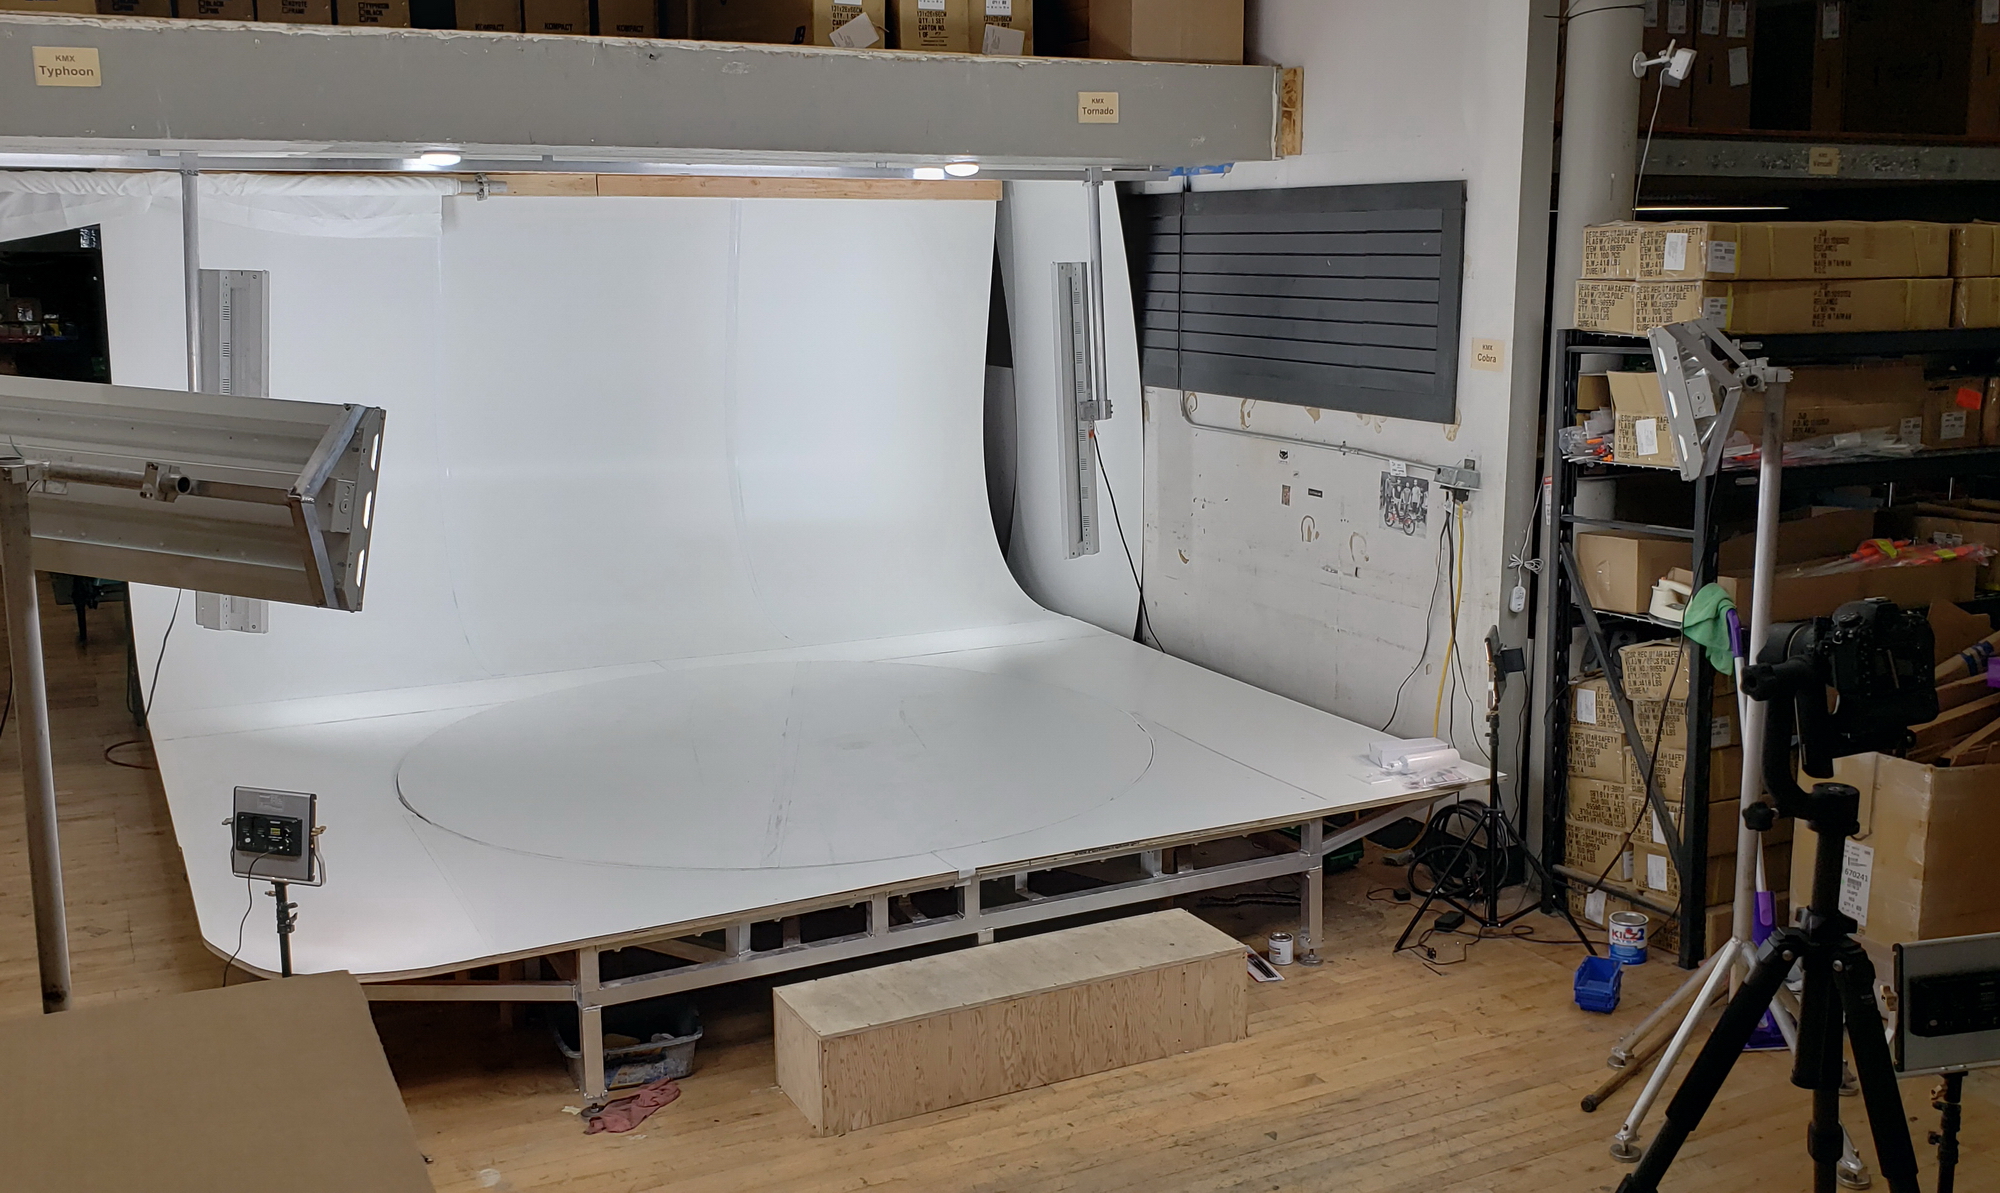
    The whole turntable with stage measures 12ft wide by 18ft deep. There's even an additional drop-down canvas backdrop which extends the width for shooting longer trikes like the 10.5ft-long UTCustom Tandem. The entire top surface is covered in white melamine including a curved backdrop that gently curves to the ceiling. The melamine surface is nearly perfect as it reflects a lot of light without producing shiny highlights on camera.

    Lighting of course is one of the most important considerations. Because they need repeatable results every time, getting the lighting perfected was critical. To light it all, they use six 250W 30,000 Lumen LED fixtures, one 90W 12,000 Lumen LED fixture, and three smaller LED panels all with custom adjustable mounts they made themselves. This is in addition to the fluorescent house lights. All lights are 5000K. Needless to say, there is a lot of light. About half of the lights are aimed at the background and table surface and the rest are pointed at the trike on the turntable.

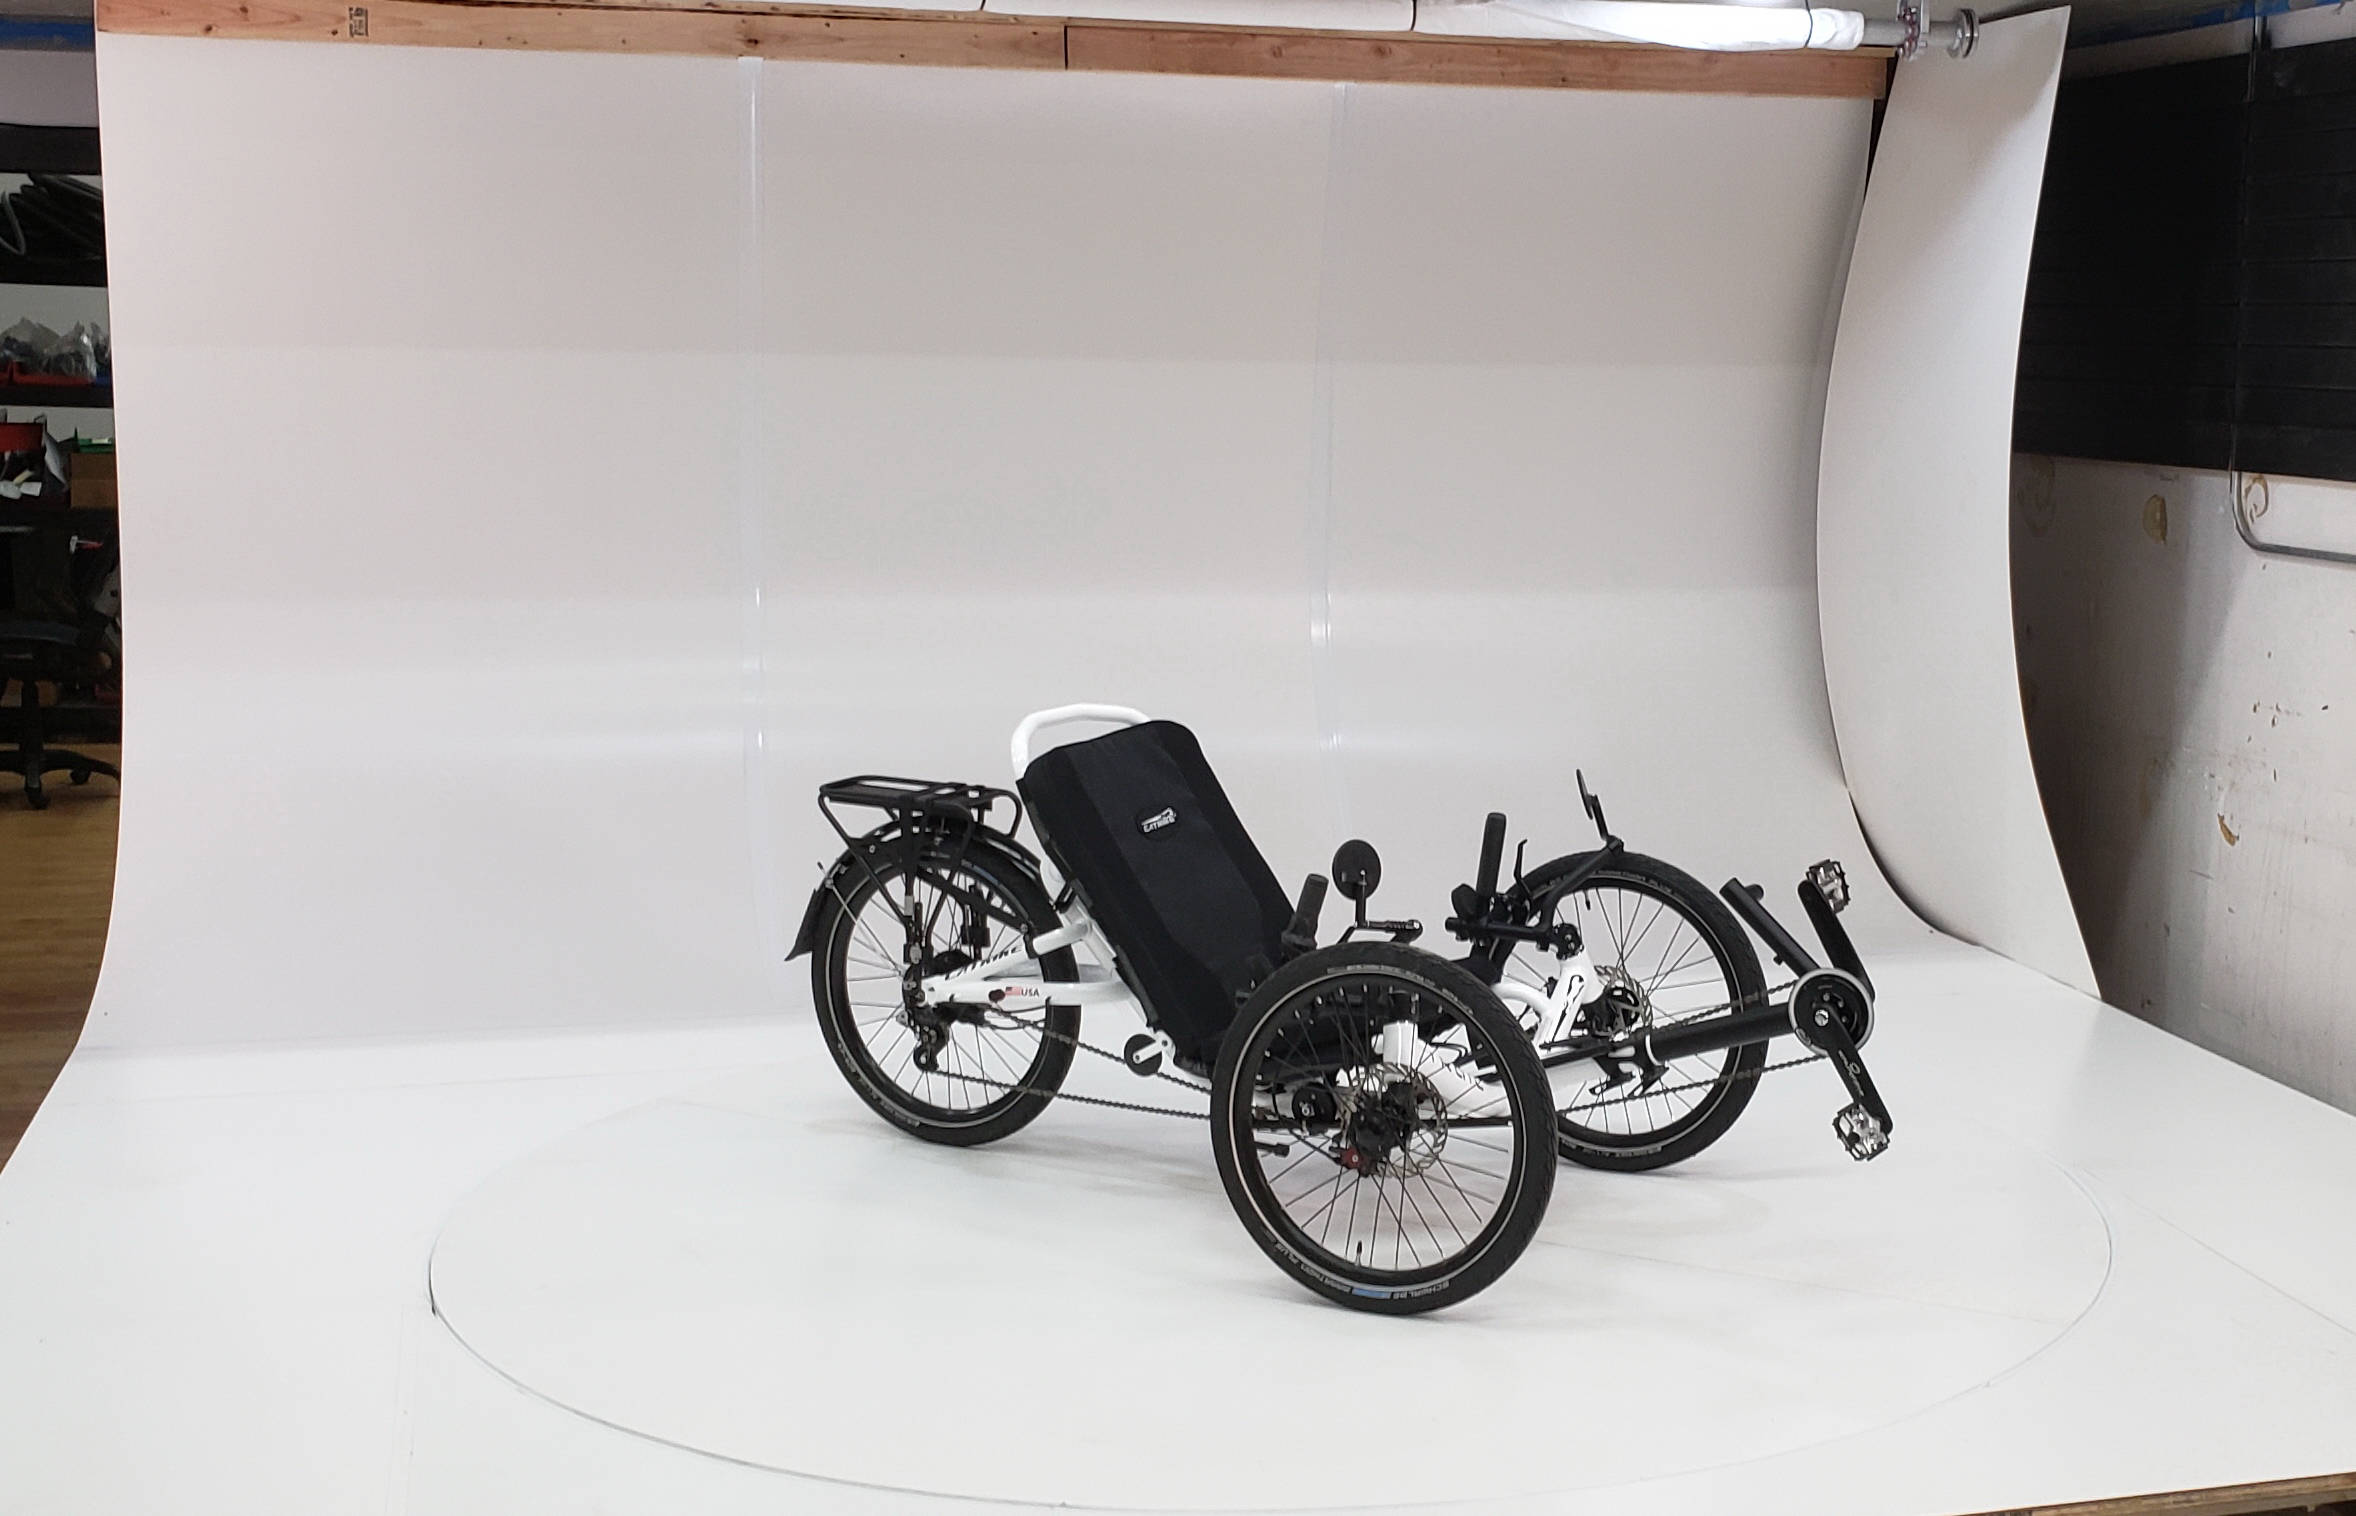
    The camera used is a Nikon D850 with a 58mm prime lens. Focus is set manually to the center of the turntable and locked so it does not hunt during shoots. Aperture is set to F11 and shutter speed to 1/50. This puts ISO right about 125. This combination of camera and glass provides an incredibly sharp and detailed image. Images are captured in RAW format at 46MP.

    The table is turned on and as it rotates the camera is set to take pictures every 3 seconds using the intervalometer on the D850. The camera stops taking pictures after 65 pictures are taken and the trike has made a complete 360 spin.

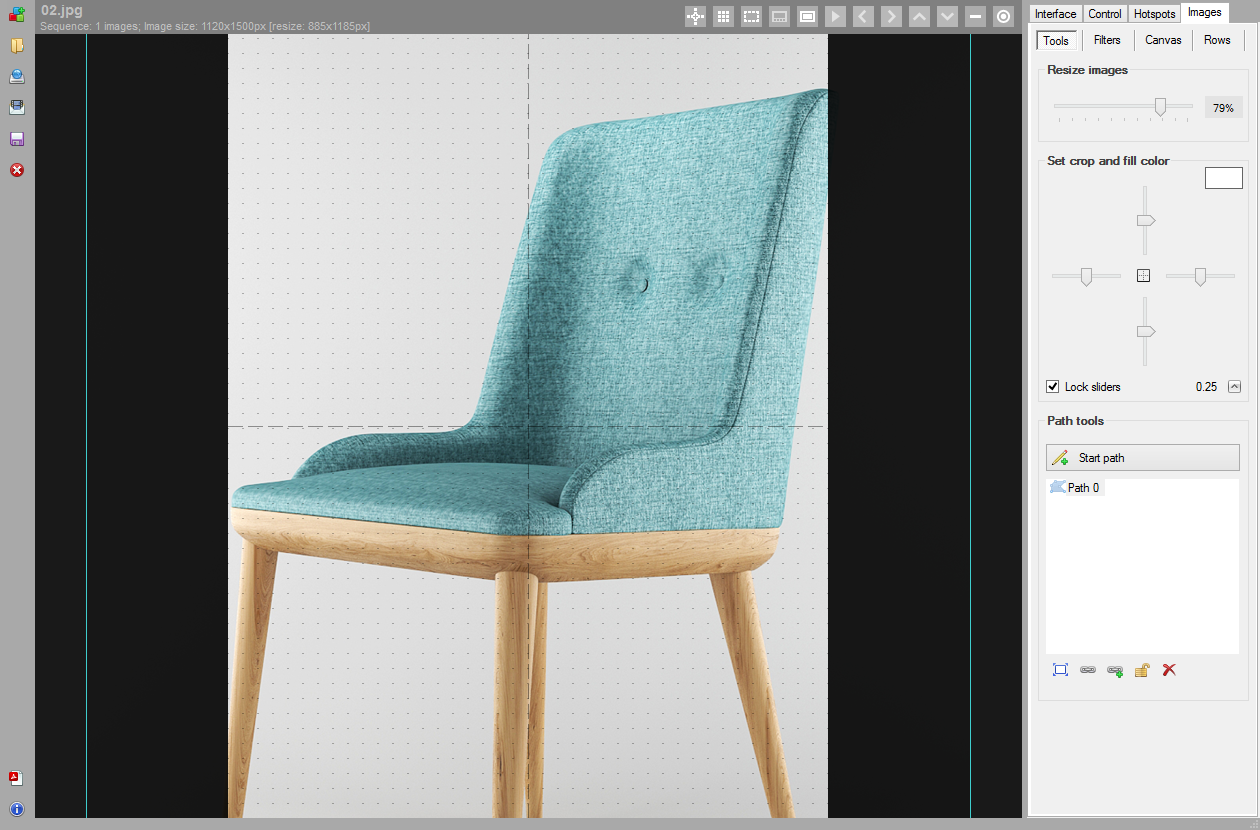
    The RAW files are sent directly to a network drive and imported into Lightroom CC. Here you can see what the RAW files look like, which if you're not used to working with RAW images may not look good to you. The nice thing about this format though is the huge amount of color and light information which a jpeg will just throw away. 

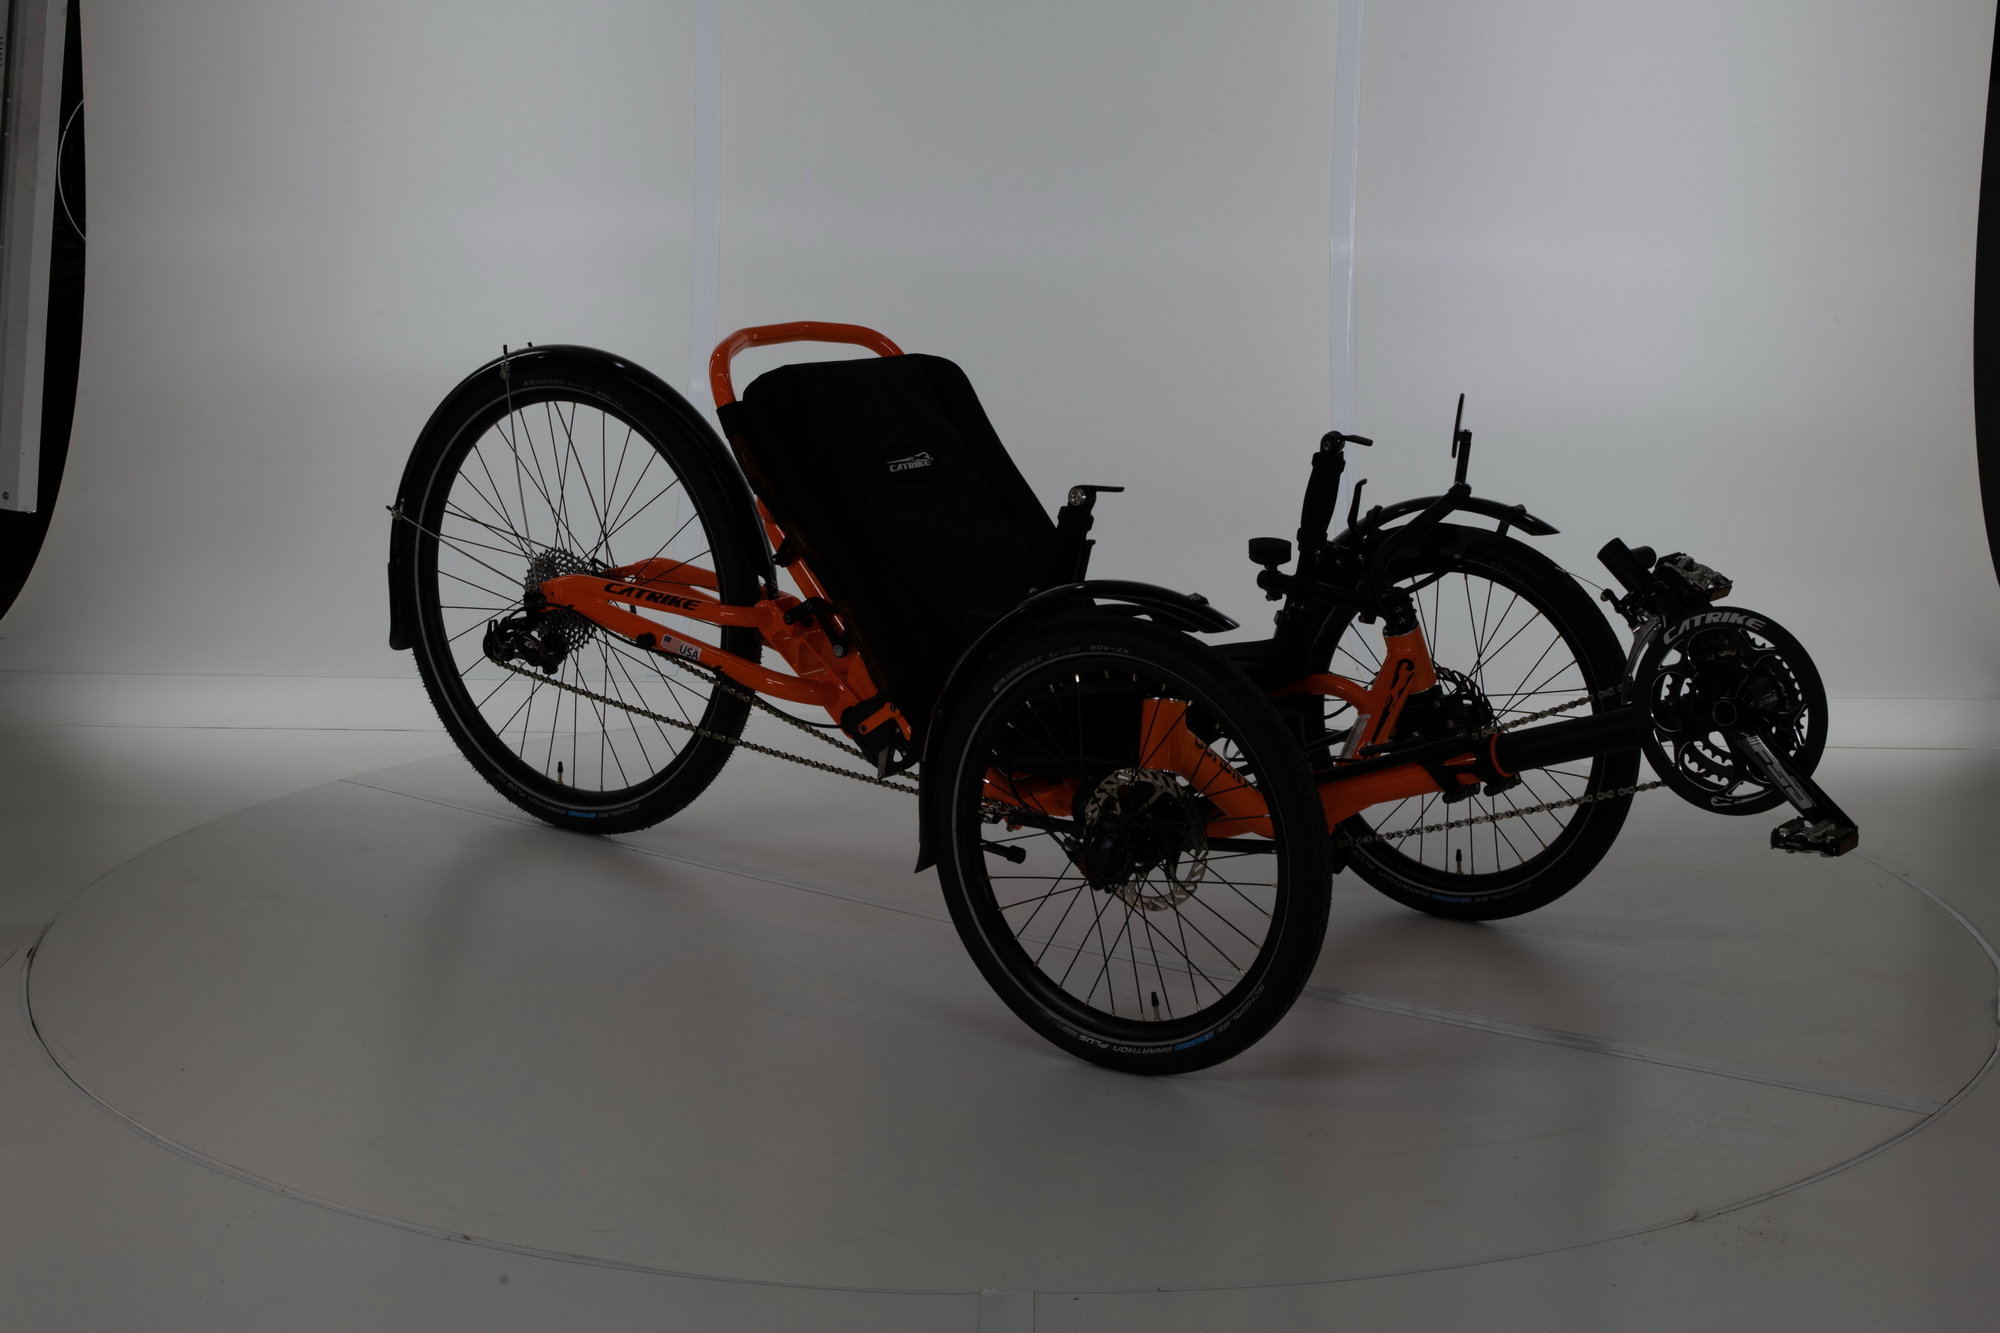
    Here's the actual RAW file if anyone wants to play around with it: download

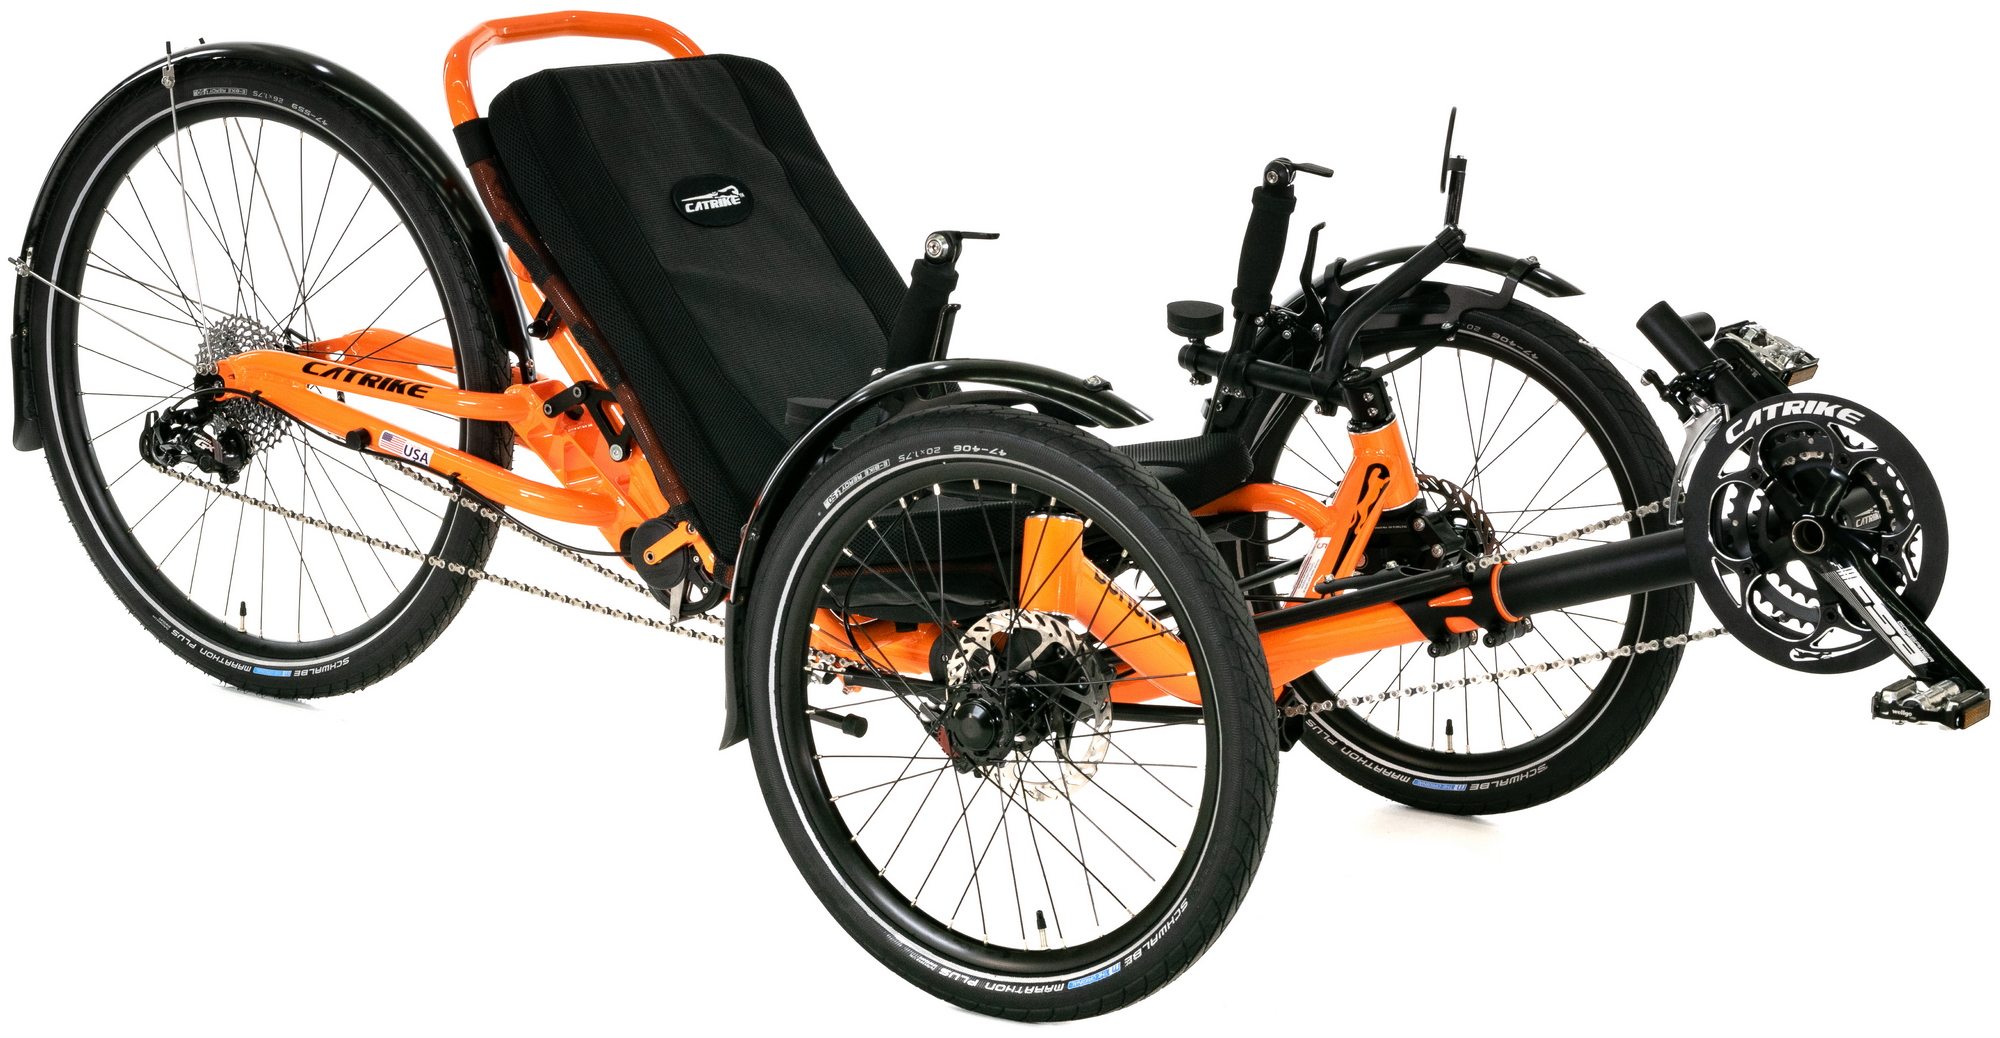
    With just a little bit of tweaking in Lightroom they end up with this as the finished result. Since the lighting is consistent the adjustments are nearly the same for every project. Once the settings are tweaked perfectly on one of the photos they are copied to all the photos from the batch. Finally, the crop is set and copied to the batch.

    Cropped and color corrected photos are exported as jpegs with 2000 pixel width and easily turned into a 360 product spin with WebRotate's SpotEditor. The finished project is then uploaded to the web server directly through the publish project tool.

    "So far the process averages about 35 minutes," - says Guy, "which is pretty close to our goal. I'm sure that with a bit more refinement we'll hit it. And, for now, we have amazing 360 product views of our trikes and our customers are loving them. In addition, we have super hi-res pictures of our trikes from 65 different angles to use as needed."

    Check out the final page from the sample pictures given here:

    http://www.utahtrikes.com/RECENTTRIKE-5201950_CatrikeDumontFullSuspensionFoldi.html

    So, what's next for Utah Trikes?

    "Well, I'm really intrigued by the multi-row capabilities of WebRotate 360 and we are already working out ways to implement it in our process," - says Guy, "Maybe follow up with us in a couple months and you'll be able to ride a virtual trike on our website."

  • Guest Post: Custom 360 Product Photography Turntable from Cable Drums by Twin Moons

    Photo by Bruno Glätsch

    Hi everyone! My name is Husna Azizadah, and I’m one of the co-founders at Twin Moons LLC, located in Hacienda Heights, California. We offer three core services at Twin Moons: 3D Virtual Tours, Google Street View Tours, and 360 product photography. And of course, we use WebRotate 360 exclusively for all of our 360 product photography!

    Recently, one of our clients that we had created a virtual tour for asked if we were able to do 360 photography of their products. They manufacture commercial gate operators that weigh approximately 200 to 250 lbs...

    Of course we said, "YES", but deep down inside I knew that we didn't have a turntable that could handle this! We had just started with 360 product photography at this point and only had small turntables that could handle up to about 50 lbs. Our budget was tight so there was no way we could afford one of those high-end turntables that cost in the thousands. But I was confident that our team would be able to come up with a solution, and so we started on our DIY quest!

    A couple of days after meeting with this client, my husband was at another client site and noticed that they had these giant cable drums in their warehouse that they were getting rid of:

    These looked like a perfect fit for the job, so he brought a couple back to the office.

    After doing some searching, we found these 1,000 lb capacity lazy susan bearings. Installation took only about half an hour, and we were ready to take it for a spin:

    The next challenge was the lighting setup. Our softboxes were too small to use for this product, so we had to come up with another cost-effective solution. We opted to build some large scrims with PVC and cloth shower curtains from Target (NOT the plastic ones)! The shower curtains were attached using industrial strength Velcro:

    The top of the turntable was covered with large white Formica sheets that we found at Home Depot and for the backdrop, we used Savage Seamless background paper. I absolutely love this paper since it’s 12 yards long, 107 inches wide, and has just the right thickness.

    We were now ready to shoot, but there was still one last step left, and that was to place incremental markers on the turntable. We opted for 5 degree increments as that would give us a lot of flexibility. For these products, we decided on taking shots at 15-degree increments for a total of 24 shots:

    We photographed the product with a tethered Nikon D750 (shot at f/16, 1/6 sec, 50mm). The background was lit with Nikon SB600 and SB700 flashes sitting on the floor and pointing at the background. Here’s the setup (in early state; sorry, I couldn’t find a better picture!):

    Each image required about 2-3 minutes of post-processing (about an hour total) in Photoshop to mask the product and blow out the background.

    And here's the final output. Just hover with your mouse or tap to load the 360 product view, then drag the images or tap to zoom-in.

    I would love to hear your feedback and address any questions. Please feel free to contact me at husna@twinmoons.com or via https://instagram.com/twinmoonsllc.

  • 3D Product Modeling and Rendering Service Launched

    We have been shooting 360 product photography professionally for a few years since 2009. It was a lot of fun but we had to stop accepting new orders once our in-house software for 360 product photography was polished up and demanded all our attention.

    Today WebRotate 360 Product Viewer is a recognized name across continents and industries. There's also a stronger demand for interactive digital experiences in e-commerce, e-learning, marketing and related media. And we expect this to accelerate in 2019 now that Amazon is jumping on the bandwagon!

    As we evaluate challenges our customers faced in recent years creating animated 360 degree content, one thing is certain: it's still profoundly difficult to produce quality 360 product photography.

    We're talking the quality of photography that actually works and gives a consistent ROI. The usual answer is to hire a professional studio. And it works! But there're not many out there who know how to shoot quality 360 product photography and the challenges don't stop there...

    1) If you are in e-commerce, your inventory is often pretty dynamic. You may have catalogs that update every X months and the logistics of re-shooting 360 product images for your catalogs is tough. Each color variation, each product option - it all has to be counted in. Photographic image consistency is also an important consideration.

    2) If you are a product designer, re-doing 360 product photography as you apply tweaks to successfully market you product before it can be launched may not be a viable option. 

    3) If you are a marketing agency or an e-learning provider, you may have requirements that are simply not realistic when it comes to 360 product photography. Consider animating various parts in an exploded product view or an intricate camera fly-by that you can't achieve without a Hollywood-grade camera rig.

    Most of these challenges can be answered with photorealistic 3D models. Time constraints, logistics, consistency, impossible angles, image quality and more - it's doable with 3D CAD and advanced 3D product rendering.

    We have put a lot of work to establish an efficient process that works hand in hand with our core product, WebRotate 360 Product Viewer. So today we are happy to offer you our 3D product modeling and rendering services.

    Send us a couple of photos of your product or existing CAD designs you might already have for your manufacturing, and we will take it from there! The end result is the same high-quality WebRotate 360 product view that thousands rely on.

    Start your project

  • Seven Highlights of WebRotate 360 Product Viewer v3.6.3

    Photo by Carl Heyerdahl

    If you haven't noticed, there were two releases of WebRotate 360 Product Viewer that we quietly delivered in 2018. The objective of these releases (v3.6.2 and v3.6.3) was a targeted feature update and a few fixes and improvements for trickier issues that have accumulated in v3.x.

    Here's the list of 7 features that we would like to highlight:

    • Viewer loading can be paused on the first "pre-loader" image
    • Zooming is now possible in the full-screen mode
    • Zooming can be triggered on a single mouse click or a touch-screen tap
    • Zooming can be incremental
    • Optional toolbar auto-hide
    • Mouse wheel can be used to spin images
    • Simplified viewer skin with a single control button


    Pause on "pre-loader" image

    One of the concerns we hear from our users is "how your 360 product views will affect my page loading speed". And while we have several built-in capabilities that take care of the bulk of the issue, there was always the need for the option to not load the entire set of 360 product images until user decides to interact with a spin. It's especially important if you have a portfolio page or a gallery with several embedded spins. Another good case is when you have massive multi-row 3D product spins with hundreds of images.

    The feature is optional and can be activated in SpotEditor under Control -> Rotation via "Pause loading after the first image". When it's activated, the viewer downloads a single image that you have selected via "Set current image (row) as first" on the same tab and pauses further loading until user taps inside the view (or hovers over if this option is checked).

    If you want to place a small info button at the bottom of the view with your custom text upon presenting the first image, enter some text in the Hint field or leave it empty which can give your web designer some freedom as to how to tell user that there's a 360 product view. Or your web designer can customize our default "hint" styling further in CSS.

    Click this image to see an example of a 3D product view consisting of 288 images that pauses loading until user interaction:


    Zooming enhancements

    WebRotate 360 ® is used on large touch-screen devices at trade-shows, in merchandising mobile apps where showing smaller details is important, in training and education environments where quick and precise navigation to different parts of a 360 object view is required.

    With the last two releases we made sure this area of the product is sufficiently improved.

    We start with the ability to zoom in the full-screen mode (or full browser window mode, if configured). This is on by default, and as long as your high-resolution images are large enough, a user can zoom-in further while in full-screen as well.

    You can control the size of the high-res images under Images -> Tools via the Resize slider:

    These high-res images are loaded either on demand when the viewer is zoomed-in or the entire set is loaded when the full-screen mode is activated. The later can be disabled such that you can still show the low-res images that have been already loaded when switching to full-screen. This can be done by unchecking "Use high-res images in full-screen" under Control -> More Options -> Miscellaneous. With the new support for full-screen zooming this presents some interesting opportunities.

    Zoom can be incremental. What this means is that your high-res image, while loaded in full as needed, is not shown in its original size upon zoom-in. Instead its split into the number of increments that you can define under Control -> More Options -> Zoom via "Zoom-in increments". Each zoom-in action then increases the image size accordingly. You can pan further and magnify other parts of the image as needed, adding another dimension to your published media.

    The other important enhancement is the ability to zoom-in on a single tap or click inside the 360 product spin. You can activate this feature under Control -> More Options -> Miscellaneous via "Zoom on single tap".

    Considering how easy the product navigation is when this feature is on (and the new mouse wheel support we discuss below), this should have been our default setting for new projects in v3.6.3. Something we will do in the next release!

    Click this image to see an example of a 360 product view that has all three features enabled:

    Toolbar auto-hide

    The reсent major trend in web design is to "un-clutter" web pages and make the user experience a breeze. WebRotate 360 Product Viewer comes with various skins that feature optional toolbars that sometimes may look overwhelming if paired with a super clean modern product page or a 360 product photography portfolio (remember that you can always customize the toolbars in CSS to match your website look & feel). To follow the trend, we introduced this new feature to let you not show the toolbar until users start interacting with a 3D product view and quietly hide it again when it's not being used for a couple of seconds.

    To turn it on, navigate to Interface -> Options and check "Automatically hide toolbar".

    Click this image to see an example of a 360 product view with toolbar auto-hide enabled:


    Mouse wheel support

    At last your web visitors can use their mouse wheel to spin the images. This is especially handy when the viewer is zoomed-in or in full-screen as it nicely complements the panning of a zoomed-in image and / or doesn't directly affect user's ability to scroll the page. Or at least users would expect that page scrolling is blocked as they are exploring the product while zoomed-in. This also doesn't interfere with hotspot navigation if hotspots are present which is the case with the existing setting to spin on mouse hover.

    The feature consists of two settings located under Control -> More Options -> Miscellaneous:

    1) Rotate on mouse wheel and 2) Mouse wheel when zoomed only. The last setting makes sure that mouse wheel is only active when a 360 product view is zoomed-in or in full-screen to prevent issues with page scrolling.

    Click this image to see an example of a 360 product view with the mouse wheel support when zoomed:

    New simple Zoom skin

    This is another tool at your disposal to deliver simpler & functional user experiences when additional toolbar features are not required. The new skin was designed to go hand in hand with the zooming improvements we discussed above. It consists of a single "full-screen" button that can be placed in various corners of a 360 product view. To place the button at the top, use the new toolbar positioning option "Place at the top" located under Interface -> Styles -> Toolbar align.

    Zoom skin is available as two separate skins called "zoom light" and "zoom dark" so you can pick the one that works best with the background of your 360 product photography or website styles. The skins can be selected under Interface -> General -> Skin.

    Here's a live 360 product view by Bruno Debiasi from his recent guest post that featurs the new skin as well as some of the other features we discussed in this blog post:

    For the first time since 2011 we're raising our pricing next month. Don't wait! Get it now or stay tuned for our first sale event of 2018 that we plan in November, offering 35% off on WebRotate 360 Product Viewer at the current prices. Subscribe to our newsletter below.

Subscribe to our newsletter

Sign up to our newsletter to keep a pulse on our latest developments, informative posts and beta releases. We don't abuse it!

Signup